Introduction 00:00
When we imported our hamburger a few lessons ago, it didn’t look very good. To put it in a nutshell: many things participate in a wrong looking model.
Sometimes, we want a very realistic render. Maybe it's because we want to showcase a real-life product on our website. Or perhaps we are 3D artists, and we want to show off our work with the best possible result. Anyway, we need a render as real as possible.
In this lesson, we will learn many techniques to improve the rendering quality of our models.. Be careful though: some of those techniques can have a performance impact, and some techniques depend on your model. You'll have to adapt according to the situation.
Setup 01:12
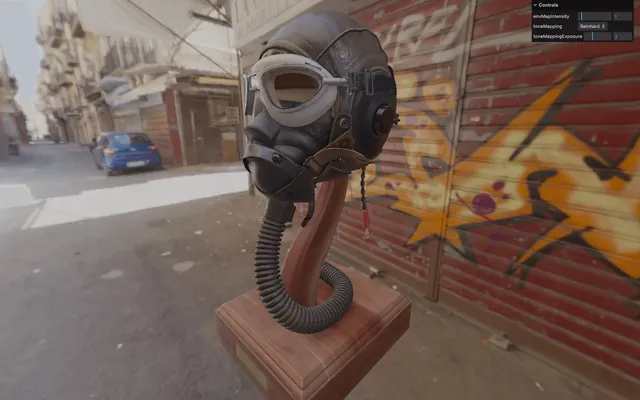
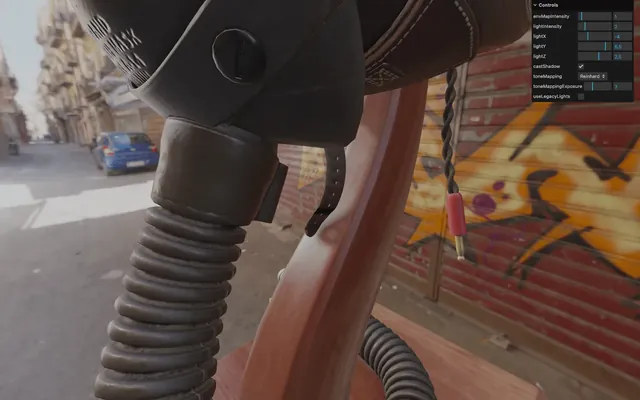
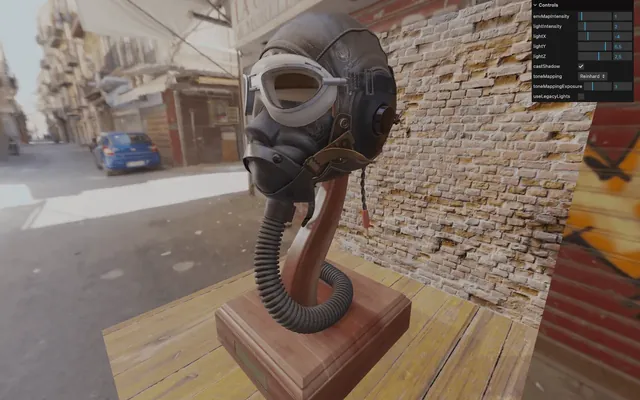
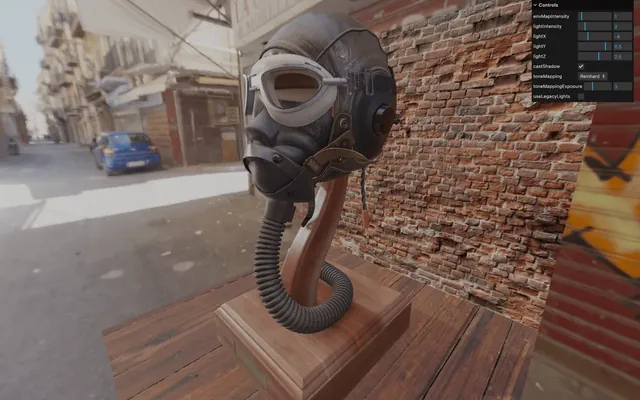
We could use our hamburger, but it's better to try a more realistic model with textures, normal maps, etc. We will use the Flight Helmet from the GLTF Sample Models repository. You can find the model in the /static/models/ folder and it’s already loaded and added to the scene.
We will also use lil-gui to tweak as many parameters as possible. That is required if we want to create the perfect render.
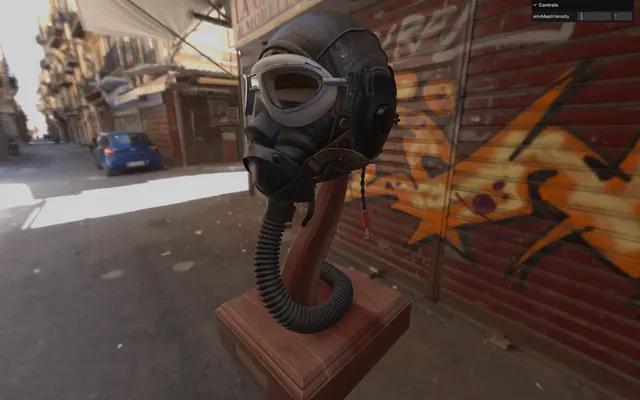
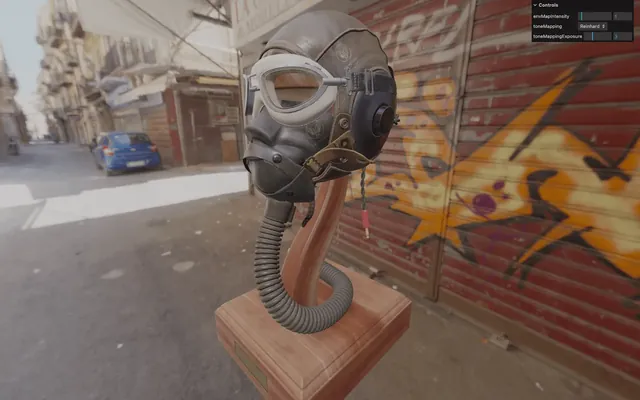
Environment map 02:01
An environment map is also set, and we are using an HDR equirectangular texture. This results in an already good looking scene with good lighting and reflection.
We are not going to cover this topic again since we dedicated a whole lesson to this. Just remember that HDR environment will get you a better lighting, but at the cost of performance and an increase in file size.
Try to use the smallest possible texture and if don’t use the environment map as a background, you can go really low with the resolution without the user noticing.
Now let’s talk about the WebGLRenderer and some of its properties that you need to discover.
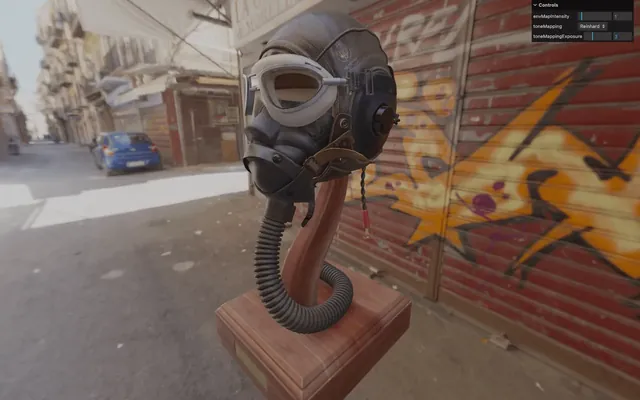
Tone mapping 03:11
The tone mapping intends to convert High Dynamic Range (HDR) values to Low Dynamic Range (LDR) values.
While we are indeed talking about the same HDR as for the environment map, tone mapping in Three.js will actually fake the process of converting LDR to HDR even if the colors aren’t HDR resulting in a very realistic render.
To change the tone mapping, update the toneMapping property on the WebGLRenderer.
There are multiple possible values:
THREE.NoToneMapping(default)THREE.LinearToneMappingTHREE.ReinhardToneMappingTHREE.CineonToneMappingTHREE.ACESFilmicToneMapping
Let’s start with THREE.ACESFilmicToneMapping:
// Tone mapping
renderer.toneMapping = THREE.ACESFilmicToneMapping
To appreciate the difference, let's add the toneMapping to our lil-gui. We can create a drop-down tweak by sending an object with different keys and values as the third parameter of gui.add(...):
gui.add(renderer, 'toneMapping', {
    No: THREE.NoToneMapping,
    Linear: THREE.LinearToneMapping,
    Reinhard: THREE.ReinhardToneMapping,
    Cineon: THREE.CineonToneMapping,
    ACESFilmic: THREE.ACESFilmicToneMapping
})
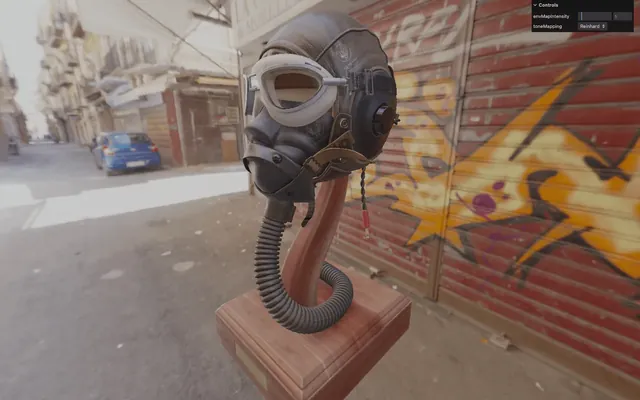
Let’s go for the THREE.ReinhardToneMapping:
renderer.toneMapping = THREE.ReinhardToneMapping
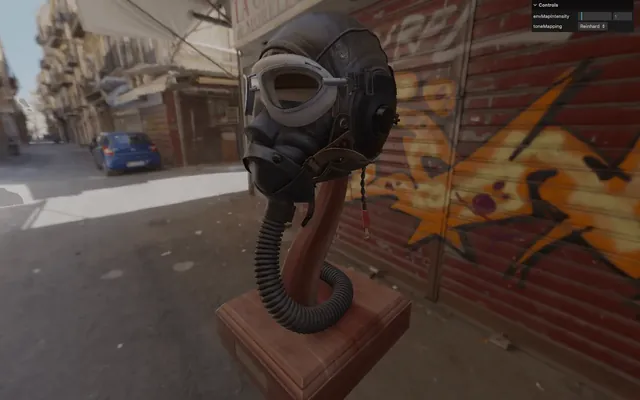
While this tone mapping may give the impression of washed-out colors, it actually achieves a high level of realism, akin to that of a camera with improper settings.
We have the flexibility to adjust the tone mapping exposure, influencing the amount of light allowed into the scene, and the algorithm will adapt accordingly. To modify this value, we simply update the toneMappingExposure property directly on the renderer:
renderer.toneMappingExposure = 2
Let's add it to lil-gui as well:
gui.add(renderer, 'toneMappingExposure').min(0).max(10).step(0.001)Let’s stick to a toneMappingExposure to 3 for now:
renderer.toneMappingExposure = 3
Antialiasing 10:35
We call aliasing an artifact that might appear in some situations where we can see a stair-like effect, usually on the edge of the geometries.
Our model isn't subject to that problem because there IT HAS A lot of details. But if you have a screen with a pixel ratio of 1, look at the edges — especially the bright ones —, rotate the camera slowly, and you might see the problem:


It's a well-known problem. When the rendering of a pixel occurs, it tests what geometry is being rendered in that pixel. It calculates the color, and, in the end, that color appears on the screen.
But geometry edges are usually not perfectly aligned with vertical lines and horizontal lines of pixel of your screen and this is why you get this stair-like artifact named aliasing.
There are many ways of fixing that problem, and developers have been struggling with it for many years.
One easy solution would be to increase our renderer's resolution, let's say to the double. When resized to its normal size, each pixel color will automatically be averaged from the 4 pixels rendered.
This solution is called super sampling (SSAA) or fullscreen sampling (FSAA), and it's the easiest and more efficient one. Unfortunately, that means 4 times more pixels to render, which can result in performance issues.
The other solution is called multi sampling (MSAA). Again, the idea is to render multiple values per pixel (usually 4) like for the super sampling but only on the geometries' edges. The values of the pixel are then averaged to get the final pixel value.
The most recent GPUs can perform this multi sampling anti-aliasing, and Three.js handles the setup automatically. We just need to change the antialias property to true during the instantiating — and not after:
const renderer = new THREE.WebGLRenderer({
    canvas: canvas,
    antialias: true
})
Those aliasing artifacts should be gone now.
Using the antialias exhausts some resources. As we said earlier, screens with a pixel ratio above 1 don't really need antialias. One right way to do this would be to activate it only for screens with a pixel ratio below 2. We will see how to achieve that in a future lesson, along with other optimizations.
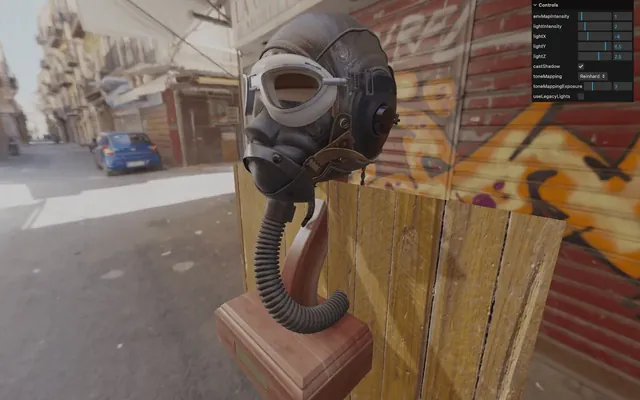
Shadows 20:29
One important addition for a realistic render is to add shadows. Since the environment map is like a light coming from every direction, it can’t cast shadows.
We need to add a light that roughly matches the lighting of the environment map and use it to cast shadows.
Directional light
We are going to use a DirectionalLight and position it randomly for now:
/**
 * Directional light
 */
const directionalLight = new THREE.DirectionalLight('#ffffff', 6)
directionalLight.position.set(3, 7, 6)
scene.add(directionalLight)
Then we add its position to our lil-gui:
gui.add(directionalLight, 'intensity').min(0).max(10).step(0.001).name('lightIntensity')
gui.add(directionalLight.position, 'x').min(- 10).max(10).step(0.001).name('lightX')
gui.add(directionalLight.position, 'y').min(- 10).max(10).step(0.001).name('lightY')
gui.add(directionalLight.position, 'z').min(- 10).max(10).step(0.001).name('lightZ')
It’ll make finding the position matching the environment map much easier which we will do a bit later.
Activate the shadows
Now that we have a light that can cast a shadow, toggle the shadows on the WebGLRenderer instance. Then, change the shadow type to THREE.PCFSoftShadowMap as we did in the Shadows lesson:
// Shadows
renderer.shadowMap.enabled = true
renderer.shadowMap.type = THREE.PCFSoftShadowMap
Activate it on the DirectionalLight and add it to lil-gui:
// Shadows
directionalLight.castShadow = true
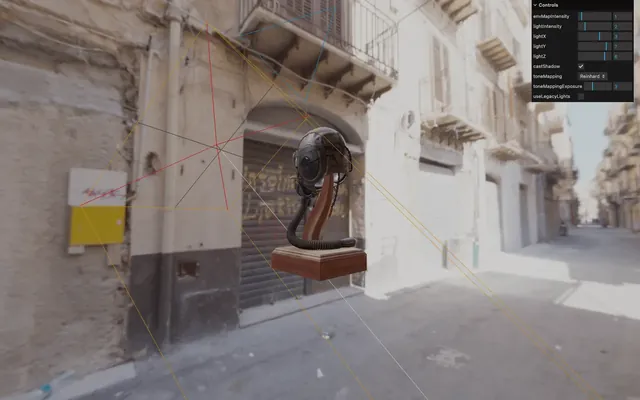
gui.add(directionalLight, 'castShadow')Add a CameraHelper to the directionalLight.shadow.camera:
// Helper
const directionalLightCameraHelper = new THREE.CameraHelper(directionalLight.shadow.camera)
scene.add(directionalLightCameraHelper)
As you can see, the area covered by the shadow camera doesn’t cover the model properly. It’s because the directional light is targeting the center of the scene by default which correspond to the lowest part of the model.
We need to move that target up and we can do that on the directionalLight.target property which is an Object3D, meaning it has a position property (like a Mesh):
// Target
directionalLight.target.position.set(0, 4, 0)
No difference? If you remember from the previous lesson, Three.js is using matrices to define object transforms. When we change properties like position, rotation and scale, those will be compiled into a matrix, but this process will be done right before the object is being rendered and only if it’s in the scene. Even though the directionalLight is in the scene, its target is not.
We have two options:
- Add the
targetto thescene - Update the matrix manually using the
updateWorldMatrix()method
We’re going to go for the manual update and call updateWorldMatrix() on the target right after changing its position:
// Target
directionalLight.target.position.set(0, 4, 0)
directionalLight.target.updateWorldMatrix()
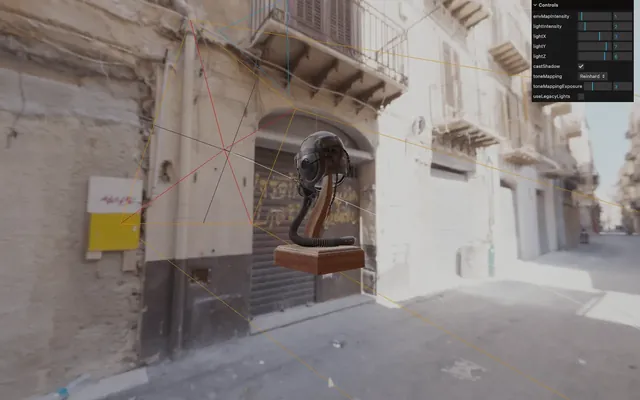
Now that the shadow camera helper fits the scene, we can reduce its far value:
directionalLight.shadow.camera.far = 15
Since we want realistic and precise shadows and because we have only one light, we can increase the shadow map size to 1024x1024 without fearing a frame rate drop.
directionalLight.shadow.mapSize.set(1024, 1024)We can now activate the shadows on all the Meshes of our model.
We have a function named updateAllMaterials that is being called when the model is loaded. This function uses the traverse() method on the scene to go through each material and test if it’s a Mesh:
const updateAllMaterials = () =>
{
    scene.traverse((child) =>
    {
        if(child.isMesh)
        {
            // Activate shadow here
        }
    })
}
In there, we can simply activate both castShadow and receiveShadow on all the children:
const updateAllMaterials = () =>
{
    scene.traverse((child) =>
    {
        if(child.isMesh)
        {
            // ...

            child.castShadow = true
            child.receiveShadow = true
        }
    })
}
You should now observe an accurate shadow, mostly on the wooden base and inside the model.
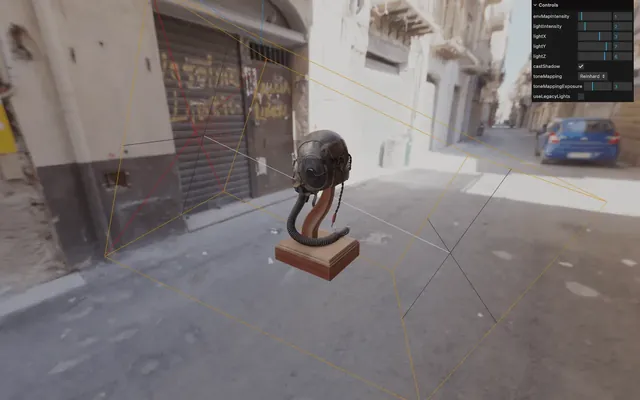
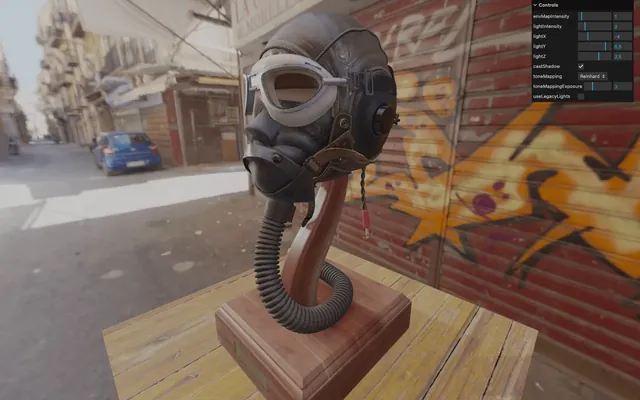
And since we see both the helper and the shadows, we can tweak the light position and intensity in order to find the perfect setting:
directionalLight.position.set(- 4, 6.5, 2.5)Remove or comment the helper:
// // Helper
// const directionalLightCameraHelper = new THREE.CameraHelper(directionalLight.shadow.camera)
// scene.add(directionalLightCameraHelper)
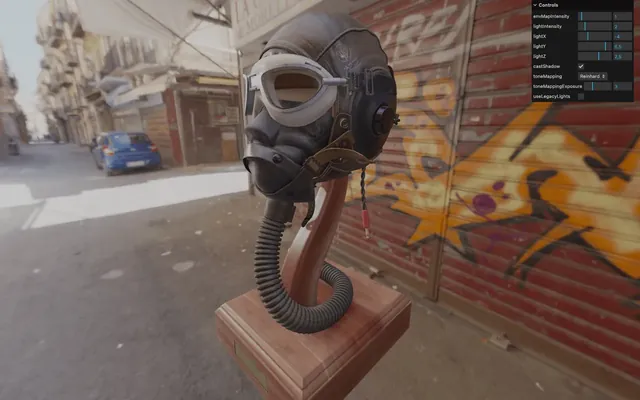
Also note that, while we went for a sharp shadow by setting mapSize to 1024, a smaller resolution would result in a blurry shadow that shouldn’t look too bad if there are enough details on the scene and it’ll actually improve performance:
directionalLight.shadow.mapSize.set(512, 512)
Textures and color space 40:16
Let’s add a floor and a back wall. The goal here is to use textures and discover a very specific problem, but it’s also the opportunity to practice.
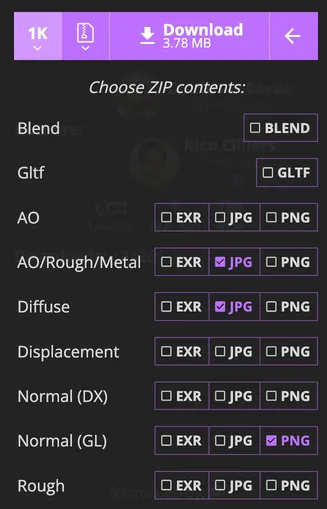
Choosing the right texture is important if we want a realistic result. There are many online resources with great textures, but the recently added Textures section of Poly Haven provides awesome textures and we can choose exactly which files to export.
To save us some time, two sets of textures are already available in the /static/textures/ but feel free to use yours. Here’s what the export setting looks like:
If you want to practice on your own, now would be a good opportunity. Create an 8 by 8 plane right below the model using the wood_cabinet_worn_long/ textures and create an 8 by 8 plane behind the model using the castle_brick_broken_06/ textures.
First we need to instantiate the TextureLoader:
/**
 * Loaders
 */
// ...
const textureLoader = new THREE.TextureLoader()
Next, we need to load the textures for the floor:
/**
 * Floor
 */
const floorColorTexture = textureLoader.load('/textures/wood_cabinet_worn_long/wood_cabinet_worn_long_diff_1k.jpg')
const floorNormalTexture = textureLoader.load('/textures/wood_cabinet_worn_long/wood_cabinet_worn_long_nor_gl_1k.png')
const floorAORoughnessMetalnessTexture = textureLoader.load('/textures/wood_cabinet_worn_long/wood_cabinet_worn_long_arm_1k.jpg')
And we can create the Mesh using a PlaneGeometry and a MeshStandardMaterial with all the textures we loaded:
const floor = new THREE.Mesh(
    new THREE.PlaneGeometry(8, 8),
    new THREE.MeshStandardMaterial({
        map: floorColorTexture,
        normalMap: floorNormalTexture,
        aoMap: floorAORoughnessMetalnessTexture,
        roughnessMap: floorAORoughnessMetalnessTexture,
        metalnessMap: floorAORoughnessMetalnessTexture,
    })
)
scene.add(floor)
Finally, we rotate it:
floor.rotation.x = - Math.PI * 0.5
And we do the same for the wall:
/**
 * Wall
 */
const wallColorTexture = textureLoader.load('/textures/castle_brick_broken_06/castle_brick_broken_06_diff_1k.jpg')
const wallNormalTexture = textureLoader.load('/textures/castle_brick_broken_06/castle_brick_broken_06_nor_gl_1k.png')
const wallAORoughnessMetalnessTexture = textureLoader.load('/textures/castle_brick_broken_06/castle_brick_broken_06_arm_1k.jpg')

const wall = new THREE.Mesh(
    new THREE.PlaneGeometry(8, 8),
    new THREE.MeshStandardMaterial({
        map: wallColorTexture,
        normalMap: wallNormalTexture,
        aoMap: wallAORoughnessMetalnessTexture,
        roughnessMap: wallAORoughnessMetalnessTexture,
        metalnessMap: wallAORoughnessMetalnessTexture,
    })
)
wall.position.y = 4
wall.position.z = - 4
scene.add(wall)
Even though we have quite a bright scene, you can see that the textures look oddly white. This is due to what we call “color space”.
The color space is a way to optimise how colors are being stored according to the human eye sensitivity. This mostly concerns textures that are supposed to be seen (in our case, bricksColorTexture).
Textures that are being used as information for bricksAmbientOcclusionTexture, bricksNormalTexture and bricksRoughnessTexture, are supposed to be encoded using a linear color.
By default, Three.js sets the color space to linear, meaning that we need to change the floorColorTexture and the wallColorTexture textures only, and we need to set their colorSpace to THREE.SRGBColorSpace:
floorColorTexture.colorSpace = THREE.SRGBColorSpace

// ...

wallColorTexture.colorSpace = THREE.SRGBColorSpace
Much better.
But you might wonder why we didn’t have to do that for the model. The reason is that this information was already set inside the GLTF file and Three.js knew what color space to use on the textures.
Final tweaks 59:03
Now that we have everything in place, we can tweak the values, make sure the directionalLight corresponds to the light in the environment map, try other environment maps, tweak the shadows, test different tone mappings, etc.
It's up to you. Take your time, stop looking at your render, and look around because you need real-life markers, make sure your screen colors are good, maybe show your work to your friends to get an external point of view until everything is correctly set.
Hamburger 01:01:01
Let's try with our hamburger. A version is already located in /static/models/hamburger.glb.
This file isn't Draco compressed. If you are using your model, make sure it's not compressed or add the DRACOLoader to the GLTFLoader as we did in the Imported Model lesson.
Comment the Helmet part (so that we can put it back if needed):
// // Helmet
// gltfLoader.load(
//     '/models/FlightHelmet/glTF/FlightHelmet.gltf',
//     (gltf) =>
//     {
//         gltf.scene.scale.set(10, 10, 10)
//         scene.add(gltf.scene)

//         updateAllMaterials()
//     }
// )
Load the hamburger located in /models/hamburger.glb the same way and use the following scale and position:
gltfLoader.load(
    '/models/hamburger.glb',
    (gltf) =>
    {
        gltf.scene.scale.set(0.4, 0.4, 0.4)
        gltf.scene.position.set(0, 2.5, 0)
        scene.add(gltf.scene)

        updateAllMaterials()
    }
)

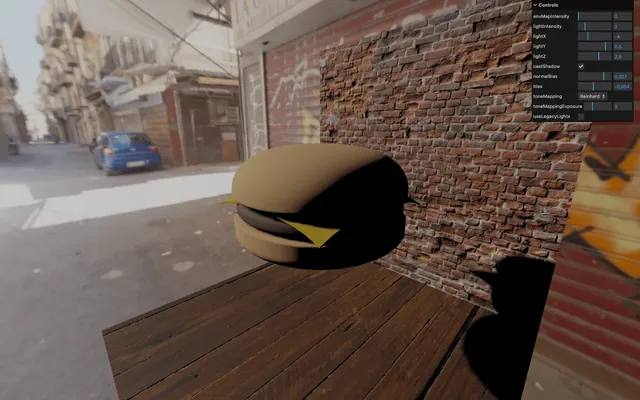
Your hamburger appears, but some nasty strips cover its surface.
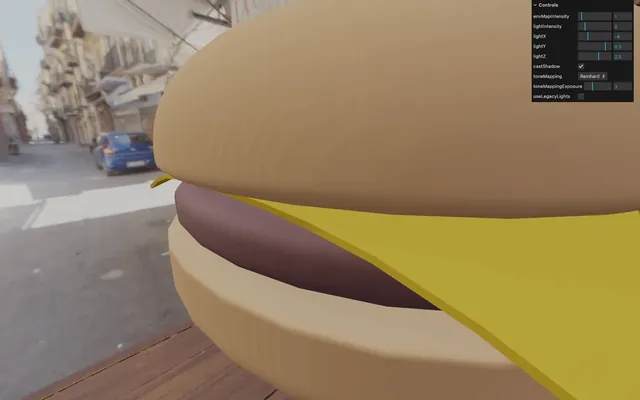
You can notice it more clearly by lowering the envMapIntensity:
scene.environmentIntensity = 0
No, we didn't let the hamburger burn on the grill.
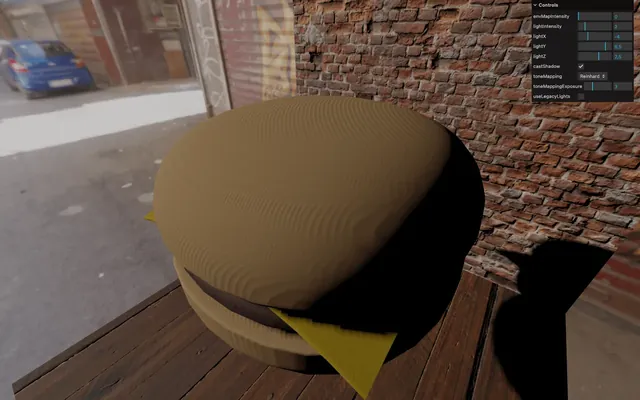
These artifacts are called “shadow acne”. Shadow acne can occur on both smooth and flat surfaces for precision reasons when calculating if the surface is in the shadow or not. What's happening here is that the hamburger is casting a shadow on its own surface.
We have to tweak the light shadow's bias and normalBias properties to fix this shadow acne.
The bias usually helps for flat surfaces.
The normalBias usually helps for rounded surfaces.
Fixing the problem is a matter of finding the right value for those two settings and what’s better than using lil-gui to find those perfect values
gui.add(directionalLight.shadow, 'normalBias').min(- 0.05).max(0.05).step(0.001)
gui.add(directionalLight.shadow, 'bias').min(- 0.05).max(0.05).step(0.001)
In our case, we can settle on a normalBias to 0.025 and a bias to -0.004:
directionalLight.shadow.normalBias = 0.027
directionalLight.shadow.bias = - 0.004
Now you get a very decent, acne-free hamburger and we can set the envMapIntensity back to 1:
scene.environmentIntensity = 1
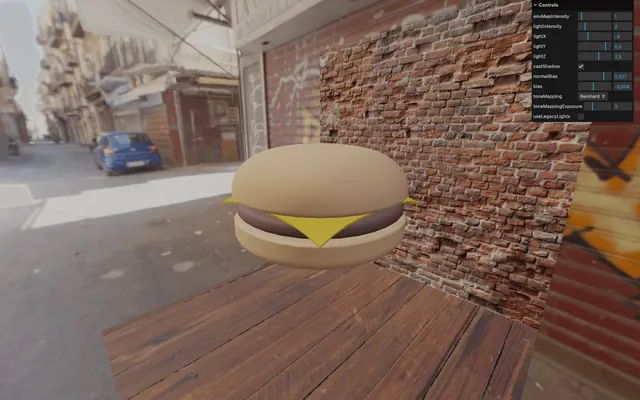
Bon appétit.
Going further 01:10:37
The techniques we discovered in this lesson are the traditional techniques that will get you a good base, but there are tons of other techniques that depend on what you want to achieve, like ambient occlusion, depth of field, motion blur, bloom, etc.
Most of those techniques imply using post-processing which you’ll learn in one of the later lessons.
Also note that we have been using HDR environment maps and textures without bothering too much for performance since we were trying to focus on realism, but always keep an eye on performance. We will talk about optimisations in a later lesson.